
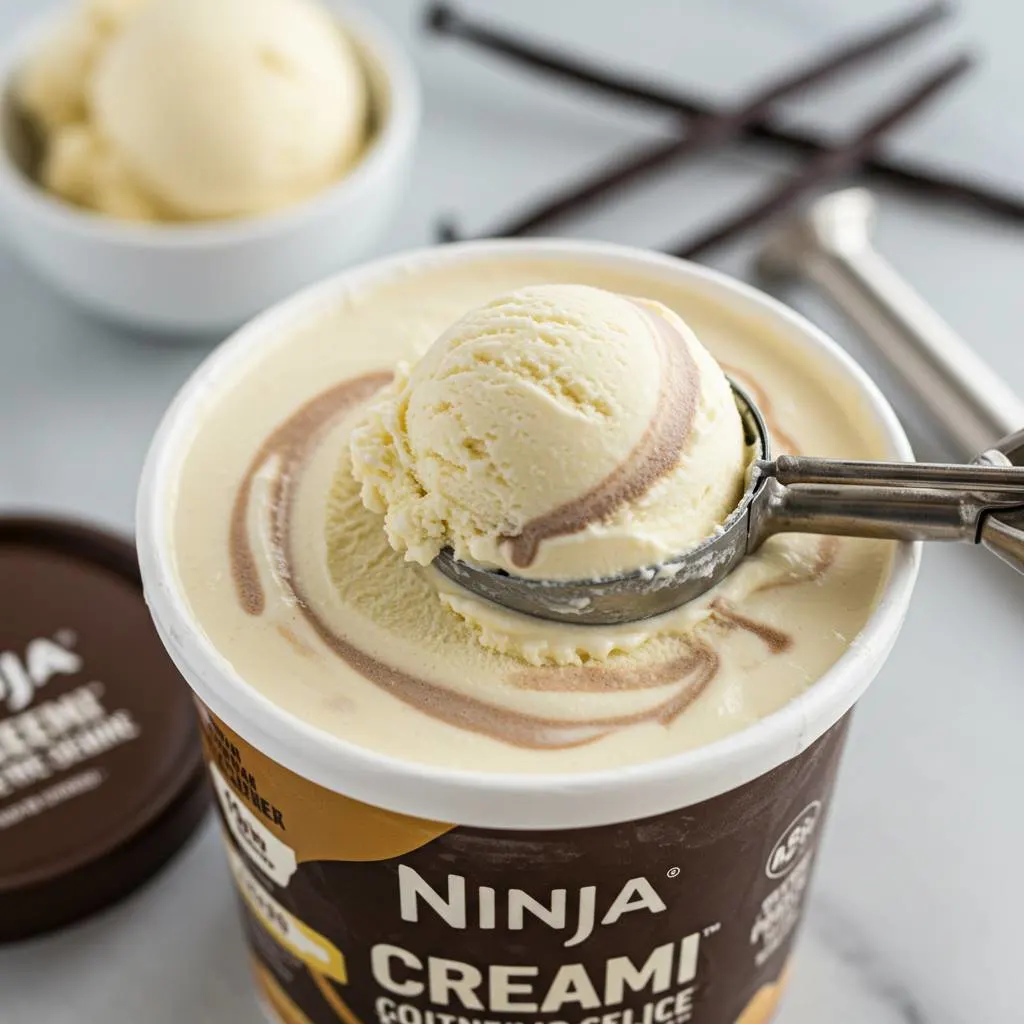
The Best Ninja Creami Protein Ice Cream
Table of Contents
Are you craving a guilt-free frozen dessert that doesn’t compromise on taste? Look no further than your Ninja Creami! This revolutionary kitchen appliance has transformed how health-conscious dessert lovers satisfy their sweet tooth, especially when it comes to making protein-packed ice cream at home. In this comprehensive guide, we’ll explore everything you need to know about making the best Ninja Creami protein ice cream recipes that are not only delicious but nutritionally superior to store-bought alternatives.
Whether you’re a fitness enthusiast looking to boost your protein intake, someone watching their caloric intake, or simply a food lover seeking healthier alternatives, this guide will walk you through foolproof recipes, essential tips, and troubleshooting advice to help you master high protein Ninja Creami recipes. Let’s dive into why this appliance is the perfect tool for creating your protein-packed frozen treats!
Why Make Ninja Creami Protein Ice Cream?
The Ninja Creami isn’t just another ice cream maker—it’s a game-changer for health-conscious dessert lovers. Here’s why it’s perfect for protein ice cream:
Nutritional Benefits
Homemade protein ice cream allows you to control exactly what goes into your dessert. You can create treats with higher protein content (15-25g per serving), significantly lower sugar, reduced fat, and fewer calories than traditional ice cream—all while maintaining that creamy, indulgent texture you crave.
Texture Advantages
The Ninja Creami’s unique “creamification” process breaks down ice crystals more thoroughly than traditional ice cream makers. This creates an exceptionally smooth texture even with protein-enriched bases, which typically can be challenging to keep creamy. The machine’s powerful blades can transform a frozen block into a velvety treat in minutes.
Customization
Perhaps the greatest advantage is the ability to customize every aspect of your dessert. You can adjust protein content, sweetness levels, fat content, and flavors to suit your specific dietary needs and taste preferences. From keto-friendly to vegan versions, the possibilities are endless with your Ninja Creami.
Understanding Key Ingredients
Protein Powder
The foundation of any good protein ice cream is, of course, the protein powder. Your choice significantly impacts both nutrition and texture:
- Whey Protein: Creates the smoothest texture and blends easily but may cause digestive issues for those with dairy sensitivities.
- Casein Protein: Produces an exceptionally thick, creamy texture due to its gelling properties—ideal for ice cream.
- Vegan Proteins: Options like pea, rice, or soy protein work well but may require additional ingredients to match dairy protein’s creaminess.
Recommendation: Use a protein powder you already enjoy the taste of. Unflavored, vanilla, or chocolate varieties offer the most versatility for creating different flavors.
Liquid Base
Your choice of liquid dramatically affects the final texture and nutritional profile:
- Dairy Options: Whole milk provides richness while lower-fat milks reduce calories. Greek yogurt adds tanginess and extra protein.
- Non-Dairy Alternatives: Coconut milk creates rich, creamy texture; almond milk offers lower calories; oat milk provides natural sweetness.
The ideal ratio is typically 1-1.5 cups of liquid per pint container—too much liquid results in soft ice cream, while too little creates an icy texture.
Sweeteners
Protein powders often contain sweeteners, but additional sweetening may be necessary:
- Natural Options: Honey, maple syrup, or agave nectar add flavor along with sweetness.
- Sugar-Free Alternatives: Erythritol, monk fruit, or stevia provide sweetness without calories.
- Sugar Alcohols: Xylitol or allulose provide superior texture compared to other sugar-free alternatives.
Thickeners/Binders
These optional ingredients can significantly improve texture:
- Xanthan Gum: Just 1/4 teaspoon per pint helps prevent iciness and improves creaminess.
- Guar Gum: Similar to xanthan gum but derived from different sources.
- Sugar-Free Pudding Mix: Adds thickness and flavor while preventing ice crystals.
- Egg Whites/Egg White Protein: Provides structure and helps incorporate air.
Foolproof Base Recipes
Recipe 1: Classic Vanilla Protein Ice Cream

Ingredients:
- 1 cup unsweetened almond milk (or milk of choice)
- 1/2 cup Greek yogurt (2% or full-fat works best)
- 2 scoops (approximately 50-60g) vanilla whey protein powder
- 1 tablespoon honey or maple syrup (adjust to taste)
- 1 teaspoon vanilla extract
- 1/4 teaspoon xanthan gum (optional but recommended)
- Pinch of salt
Instructions:
- In a blender, combine all ingredients and blend until completely smooth (about 30-45 seconds).
- Pour the mixture into a clean Ninja Creami pint container, leaving about 1/2 inch space at the top.
- Secure the lid, ensuring it’s level, and freeze for at least 24 hours (optimal results come from 24-48 hours of freezing).
- When ready to process, remove from freezer, take off the lid, and insert into the Ninja Creami.
- Select the “Lite Ice Cream” setting and press start.
- If needed, use the Re-spin function for a creamier texture.
Nutrition Estimate (per serving, makes 2 servings):
- Calories: 165
- Protein: 20g
- Carbohydrates: 10g
- Fat: 4g
- Sugar: 7g
Recipe 2: Rich Chocolate Protein Ice Cream

Ingredients:
- 3/4 cup unsweetened almond milk
- 1/2 cup Greek yogurt (2% or full-fat)
- 2 scoops (approximately 50-60g) chocolate protein powder
- 2 tablespoons unsweetened cocoa powder
- 1-2 tablespoons zero-calorie sweetener (or to taste)
- 1 tablespoon almond butter (optional, adds creaminess)
- 1/4 teaspoon xanthan gum
- Pinch of salt
Instructions:
- Blend all ingredients until completely smooth, ensuring no powder clumps remain.
- Pour into a Ninja Creami pint container, leaving 1/2 inch of space.
- Place lid on securely and ensure the surface is level.
- Freeze for 24 hours minimum.
- Process using the “Lite Ice Cream” setting.
- If needed, use the Re-spin function and/or add 1 teaspoon of almond milk.
Nutrition Estimate (per serving, makes 2 servings):
- Calories: 175
- Protein: 22g
- Carbohydrates: 8g
- Fat: 6g
- Sugar: 3g
Essential Tips for Creamy Success
Proper Freezing
- Freeze on a level surface to ensure even processing.
- Minimum freezing time is 24 hours; 48 hours often yields better results.
- Consistent freezer temperature is crucial—avoid frequent opening and closing of the freezer.
Filling the Pint Correctly
- Don’t overfill—leave about 1/2 inch at the top to allow for expansion.
- Ensure the surface is as level as possible before freezing.
- Use Ninja Creami pints with their lids for best results—improvised containers may not work well.
Mastering the Re-spin
- If texture isn’t perfect after the first spin, the Re-spin function can work wonders.
- For extra creaminess, add 1-2 teaspoons of liquid (milk or water) before re-spinning.
- Multiple re-spins are sometimes necessary, especially for protein-heavy recipes.
Choosing the Right Setting
- “Lite Ice Cream” setting works best for most protein ice cream recipes.
- If too firm, try the “Ice Cream” setting instead.
- If incorporating mix-ins, use the specific mix-in function after processing.
Handling Mix-ins
- Process the base first, then add mix-ins afterward.
- Use the dedicated mix-in function after creating your base ice cream.
- Freeze mix-ins beforehand for best texture (especially fruit pieces).
Troubleshooting Common Issues
Problem: Ice Cream is Icy/Powdery
Solutions:
- Add more fat to your base recipe (Greek yogurt, nut butter, or coconut cream).
- Include a thickener like xanthan gum.
- Ensure proper freezer temperature (around 0°F/-18°C).
- Try the Re-spin function with 1 teaspoon of added liquid.
Problem: Ice Cream is Too Hard
Solutions:
- Add more fat to your base recipe.
- Increase sweetener slightly (sweeteners lower freezing point).
- Allow pint to thaw for 5 minutes before processing.
- Use the Re-spin function.
Problem: Ice Cream is Too Soft
Solutions:
- Reduce liquid content in base recipe.
- Freeze for longer (at least 24 hours).
- Ensure freezer is cold enough (0°F/-18°C or below).
- Add more protein powder or a thickening agent.
Problem: Off-Taste
Solutions:
- Try a different brand or flavor of protein powder.
- Mask with stronger flavors (vanilla extract, cocoa powder, etc.).
- Balance with salt (a tiny pinch enhances sweetness while reducing bitterness).
- Add cinnamon or nutmeg to mask protein flavors.
Flavor Variations & Mix-In Ideas
Once you’ve mastered the basic recipes, experiment with these flavor variations:
Simple Flavor Swaps:
- Coffee: Add 1 teaspoon instant espresso powder to the base.
- Mint Chocolate: Add 1/4 teaspoon peppermint extract.
- Cookies & Cream: Use vanilla base and mix in crushed protein cookies.
- Strawberry: Add 2 tablespoons freeze-dried strawberry powder to the base.
Popular Mix-Ins:
- Crushed protein bars
- Cacao nibs or sugar-free chocolate chips
- Toasted nuts or nut butter swirls
- Fresh berries (freeze first for best results)
- Sugar-free cookie pieces
- Sprinkles (for occasional treats)
Frequently Asked Questions
Can I use any protein powder? Yes, but results vary. Whey and casein typically yield creamier results than plant proteins. Always use powder with a flavor you already enjoy.
Why is my protein ice cream icy? Common causes include insufficient fat, too much liquid, inadequate freezing time, or improper processing. Try adding more fat, using a thickener, or re-spinning with a teaspoon of liquid.
How long should I freeze before processing? Minimum 24 hours, though 48 hours often provides better results. Ensure consistent freezer temperature throughout.
Can I make keto/vegan protein ice cream? Absolutely! For keto, use low-carb sweeteners and higher fat content. For vegan versions, use plant-based protein powders and milk alternatives like coconut or almond milk.
Conclusion
With your Ninja Creami, you’re now equipped to create delicious, high-protein ice cream that satisfies your sweet cravings while supporting your nutrition goals. By understanding the principles behind perfect protein ice cream—from protein types to proper freezing techniques—you can experiment confidently and create endless variations.
Remember that perfecting your high protein Ninja Creami recipe may take a few attempts, but the delicious results are worth it. Don’t be afraid to adjust ingredients and methods until you find your perfect formula. The beauty of making your own protein ice cream is the ability to customize it completely to your preferences.
Have you tried making protein ice cream in your Ninja Creami? What favorite flavors or tips have you discovered? Share your creations and questions in the comments below—we’d love to hear about your protein ice cream adventures!